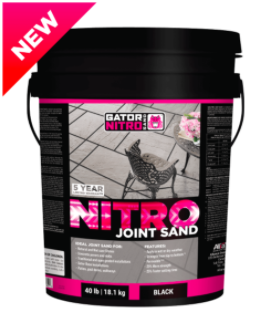
Gator Nitro
https://www.youtube.com/watch?v=6Y44Lbf09Lc&feature=emb_title
GATOR NITRO JOINT SAND INSTALLATION
Designed for pedestrian use only, Gator Nitro Joint Sand is ready-to-use and does not require any mixing. After you have followed the REQUIRED SUB-SURFACE PREPARATION described above, you are ready to apply the Gator Nitro Joint Sand. Installation will be easier with two people.
STEP 1
Ensure paver surface is compacted then thoroughly wet the area to be jointed. If the surface is dry or temperature is high, more water will be required to avoid staining of the surface when spreading the Gator Nitro Joint Sand.
STEP 2
Open the bags and spread the contents over the paved surface. Wet the Gator Nitro Joint Sand with a hose set on shower while using a squeegee or broom to push the Gator Nitro Joint Sand diagonally across the paved surface and into the joints. This action compacts and forces the Gator Nitro Joint Sand into the joints ensuring the gaps are completely filled.
STEP 3
The joints should be filled 1/8″ (3 mm) below the top surface or 1/8″ (3 mm) below the paving stone chamfer with the Gator Nitro Joint Sand. Shower the surface to rinse off excess material from the paved surface. Repeat steps 2 and 3 until the whole paving area is completed.
STEP 4
Any excess Gator Nitro Joint Sand residue left on the paved surface can by simply cleaned off by brushing and rinsing off the surface. Excess material can be stored directly in the pail with 2″ (50 mm) of water covering the Gator Nitro Joint Sand and closing the pail tightly. Excess product will last an extra 4 weeks when stored in this fashion.
For a nicer, smoother surface joint finish, use a suitable mason jointing tool. This process can only be done once Steps 1 to 4 are completed and the Gator Nitro Joint Sand is in its curing phase. Allow 18 hours of cure time before pedestrian use.


